Ingesting MQTT Data into Google BigQuery for Real-Time Analytics

The proliferation of IoT devices demands robust, scalable solutions for collecting, processing, and analyzing massive streams of real-time data. MQTT has long been the protocol of choice for efficient device-to-cloud communication, and now, the challenge shifts to seamlessly funneling this critical operational data into a powerful analytics platform. This is where Google BigQuery shines as a highly scalable, serverless data warehouse.
With the recent release of EMQX 6.0, this integration becomes more direct and powerful than ever before, featuring a data integration capability specifically for BigQuery.
This tutorial will guide you step-by-step through leveraging EMQX 6.0 to establish a high-performance pipeline, enabling you to ingest real-time MQTT data directly into BigQuery for immediate analysis and actionable insights.
Prerequisites
Before you begin, make sure you have:
- An active Google Cloud Platform (GCP) account with BigQuery API enabled.
- EMQX 6.0 Enterprise Edition downloaded and running.
- A test MQTT client (such as MQTTX) installed.
Part 1: Prepare Your BigQuery Environment
Let’s get BigQuery ready to receive MQTT data from EMQX. We’ll create a service account, a dataset, and a table to store the streaming data.
Step 1. Create a GCP Service Account and Key
To allow EMQX to authenticate with BigQuery, we’ll use a Service Account with the right permissions.
- In the Google Cloud Console, go to IAM & Admin → Service Accounts → Create Service Account.
- Enter a name and description.
- Grant the BigQuery Data Editor role for access to datasets and tables.
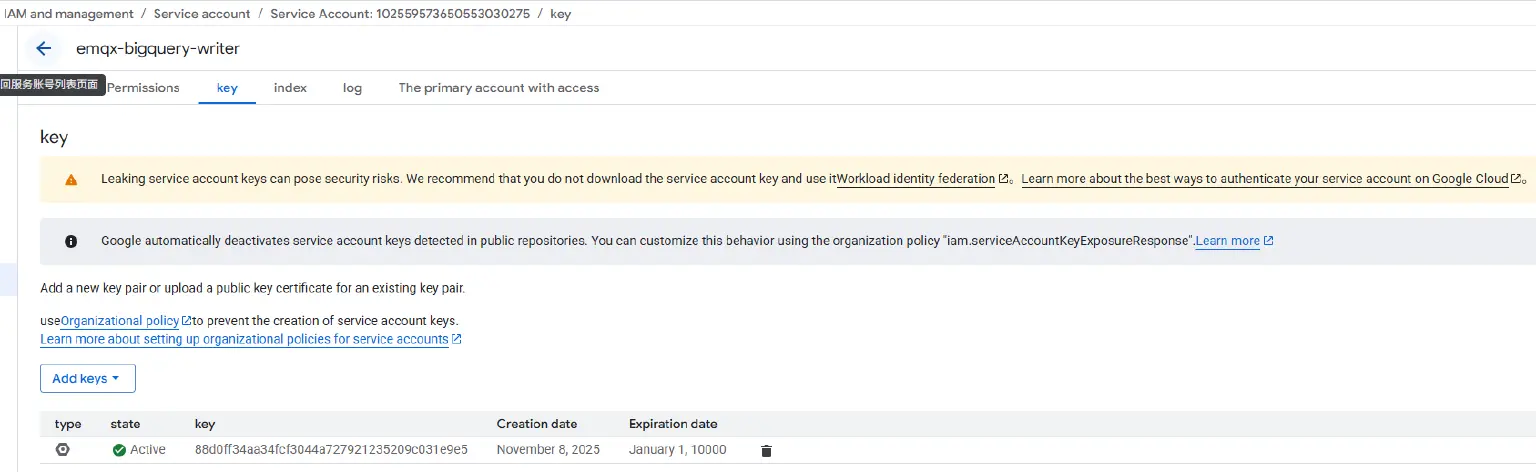
- After creation, click the Keys tab → Add Key → Create new key → select JSON.
- Download the key file and store it securely. EMQX will use this file for authentication.
Step 2. Create a Dataset and Table in BigQuery
- In your GCP Console, go to BigQuery.
- At the top of the Explorer panel, click the blue + CREATE DATASET button.
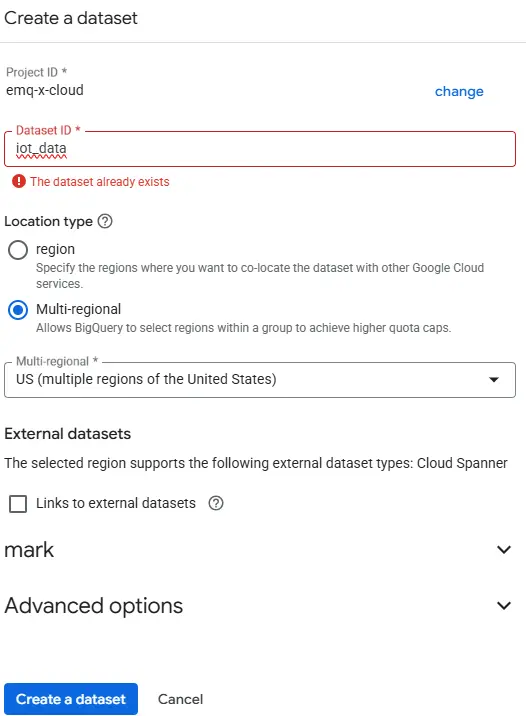
- In the pop-up window, fill in the following:
- Dataset ID: iot_data (you can choose any name)
- Data location: US (multiple regions of the United States)
- Keep other options as default
- Click Create dataset.
Next, create a table inside the dataset:
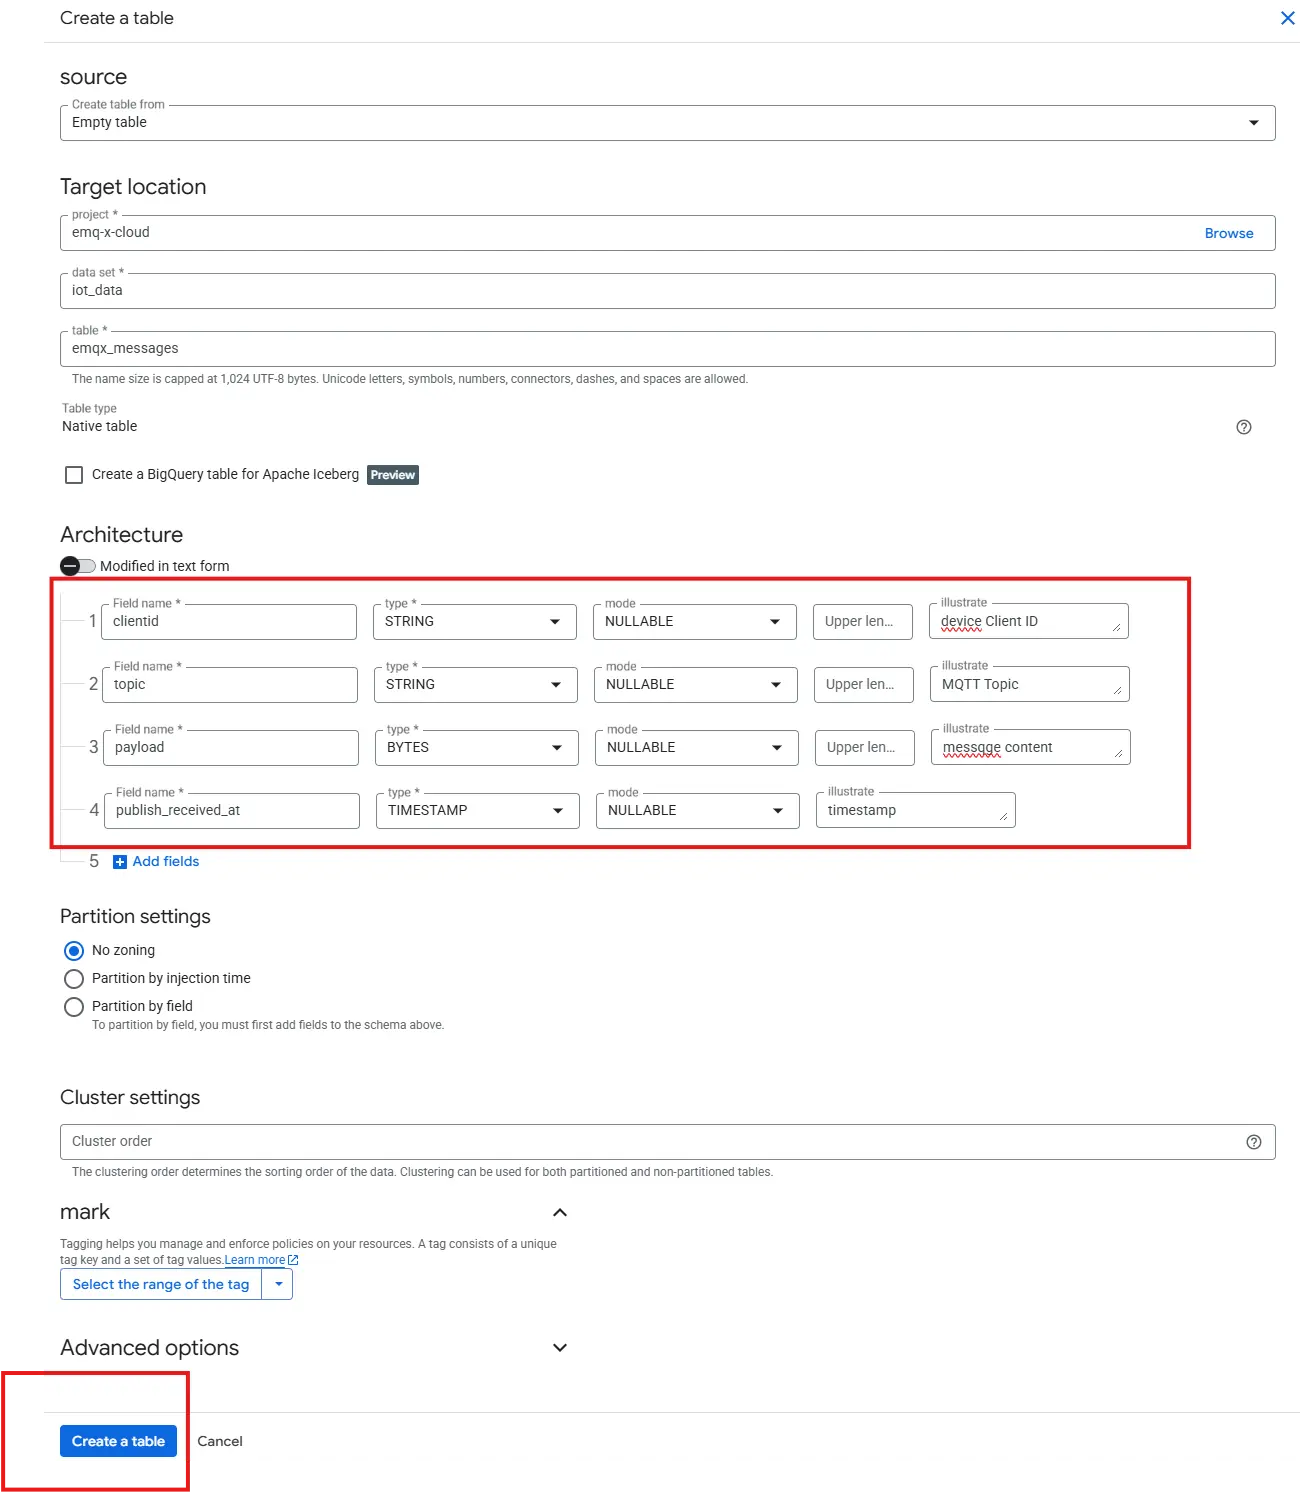
- Click the dataset name iot_data, then click + CREATE TABLE.
- Source: Empty Table
- Table name: mqtt_messages
- Define the schema. Click Edit as text and paste the following:
- clientid: string,
- payload: bytes,
- topic: string,
- publish_received_at:timestamp
Step 3. Assign Permissions
Now, give your Service Account permission to write to this dataset.
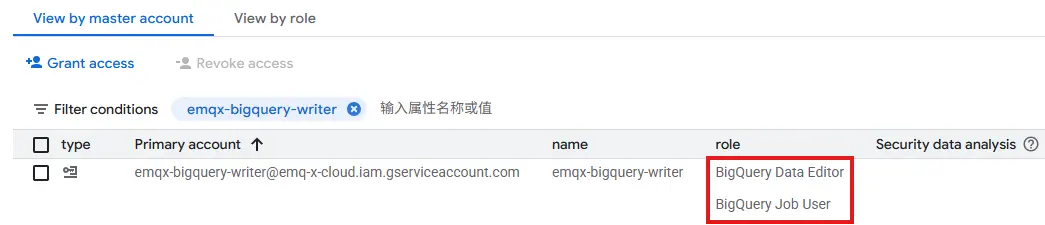
- Select your dataset → click Share dataset.
- Add your service account email.
- Assign the following roles:
- BigQuery Data Viewer (read)
- BigQuery Data Editor (read/write)
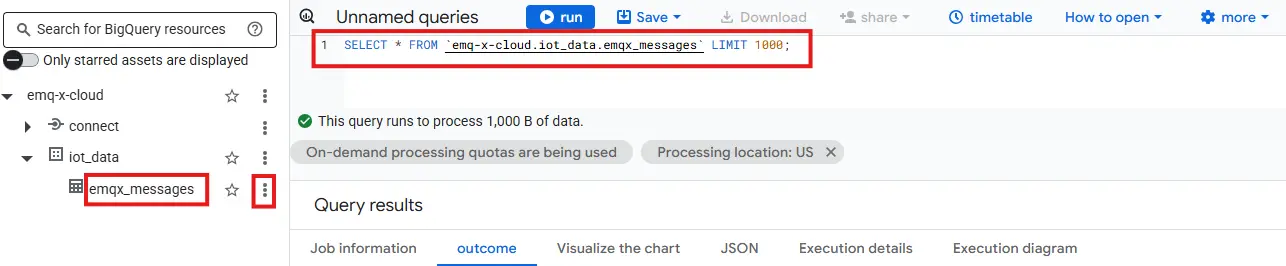
Step 4. Test Table Access
Open the BigQuery SQL editor and verify that your table is accessible:
SELECT * FROM `emqx-x-cloud.iot_data.emqx_messages` LIMIT 1000;
Part 2: Configure the EMQX Data Integration
Now that BigQuery is ready, we’ll configure EMQX to stream MQTT data directly into your dataset. Everything can be done visually through the EMQX Dashboard—no coding required.
Step 1. Create the BigQuery Connector
- Log in to the EMQX Dashboard.
- Go to Integration → Connector.
- Click Create in the top-right corner.
- Select BigQuery from the connector list.
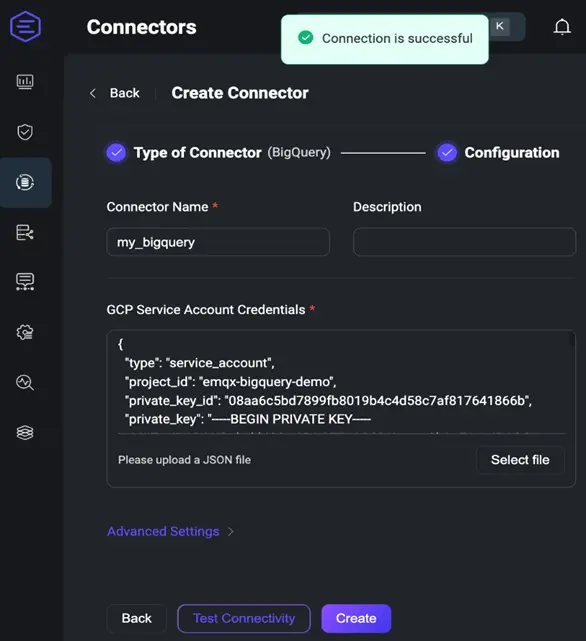
- Fill in the details:
- Name: my_bigquery
- Description: optional
- Under GCP Service Account Credentials, upload the JSON key file you downloaded earlier.
- Click Test Connectivity to confirm the connection works.
- Once successful, click Create.

Step 2. Create a Rule to Process Data
Next, define how EMQX should handle and transform incoming MQTT messages.
- Go to Integration → Rules → Create.
- Enter Rule ID: my_rule.
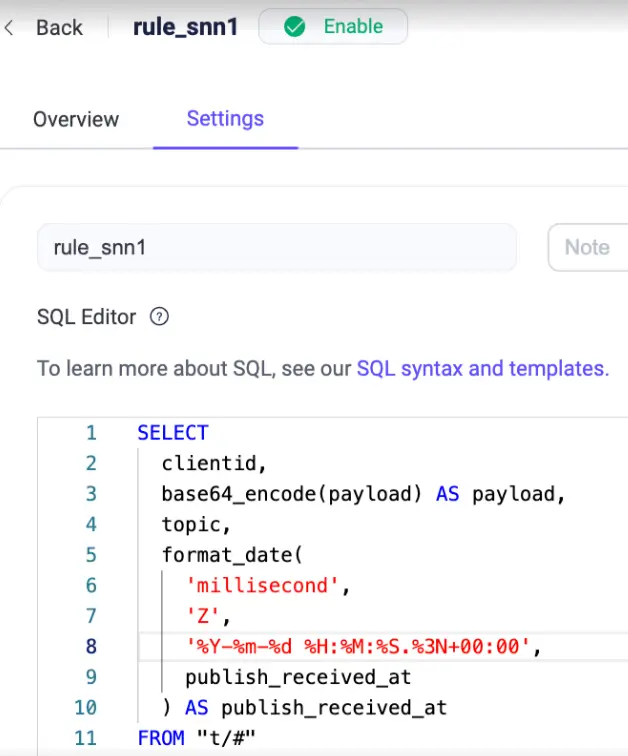
- In the SQL Editor, add the following:
SELECT
  clientid,
  base64_encode(payload) AS payload,  -- Encode the string as Base64
  topic,
  format_date(
    'millisecond',  -- Input unit is milliseconds
    'Z',            -- Output in UTC
    '%Y-%m-%d %H:%M:%S.%3N+00:00',  -- BigQuery TIMESTAMP acceptable format
    publish_received_at
  ) AS publish_received_at
FROM "t/#"
This rule filters messages from the topic t/bq and prepares them for insertion into BigQuery.
Step 3. Add the Action
Now we link this rule to the BigQuery connector.
- Click Add Action → Create Action.
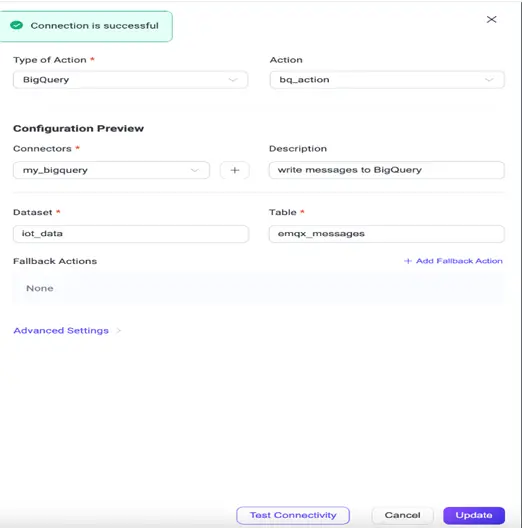
- Set the following fields:
- Type of Action: BigQuery
- Action: bq_action
- Connector: my_bigquery
- Dataset: iot_data
- Table: emqx_messages
- Click Test Connectivity again to ensure it can reach BigQuery.
- Click Create to finalize the configuration.
Part 3: Test and Verify in Real Time
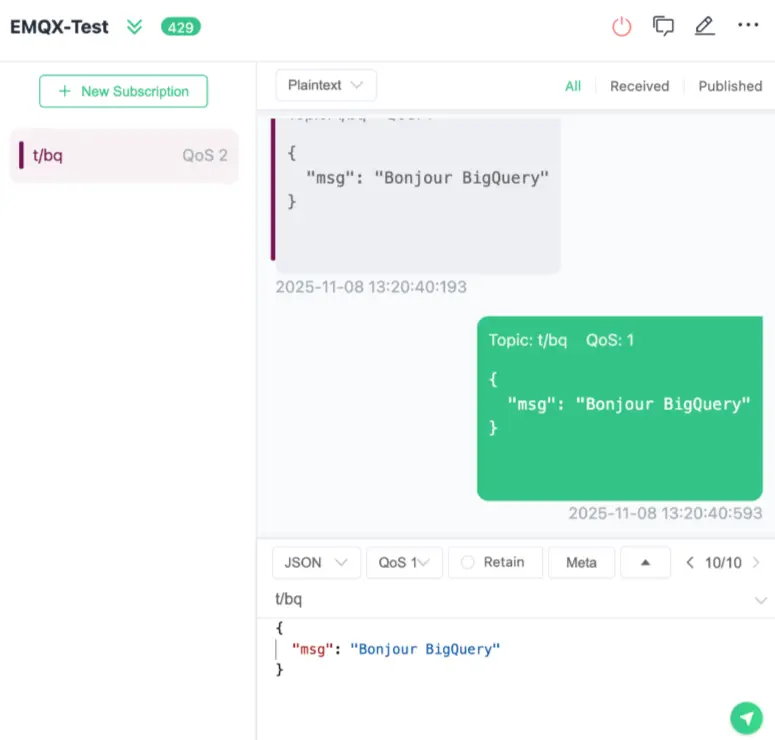
Step 1. Publish an MQTT Message
Use MQTTX or any MQTT client to publish a test message to the topic you configured.
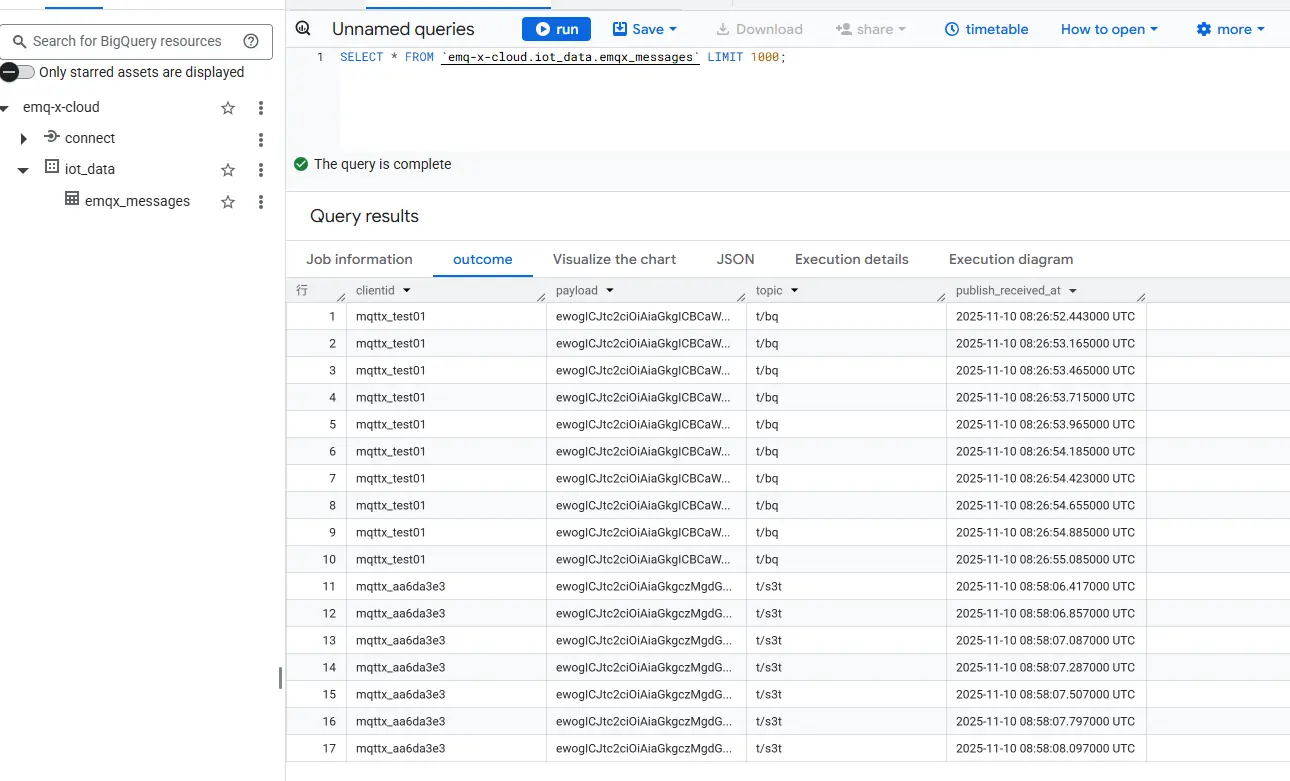
Step 2. Verify the Data in BigQuery
Go back to your BigQuery Console and query your table:
SELECT * FROM `emq-x-cloud.iot_data.emqx_messages` LIMIT 1000;
You should instantly see your test data appear, no batch jobs, no waiting.
Unlock Your Real-Time Data
In just a few simple steps, you’ve built a real-time data pipeline connecting your IoT devices to Google BigQuery. No complex ETL jobs. No delays. Just instant insights from your MQTT data — ready to visualize in Looker Studio, Grafana, or any BI tool of your choice.
With EMQX 6.0’s BigQuery Connector, you can finally harness the power of streaming IoT data for immediate analytics and smarter decisions.